Introductions
Covered in this section:
Bootup and Shutdown
Opening the Storage Drawer
Sound Controls
Using the Light Guns and Steering Wheel Peripherals/Accessories
Navigation is covered in a separate section, HERE
View the video above for first-time setup instructions*
ANTI-TIP HARDWARE
Please mount the included anti-tip hardware to the wall behind your cabinet. This is a mandatory safety feature:
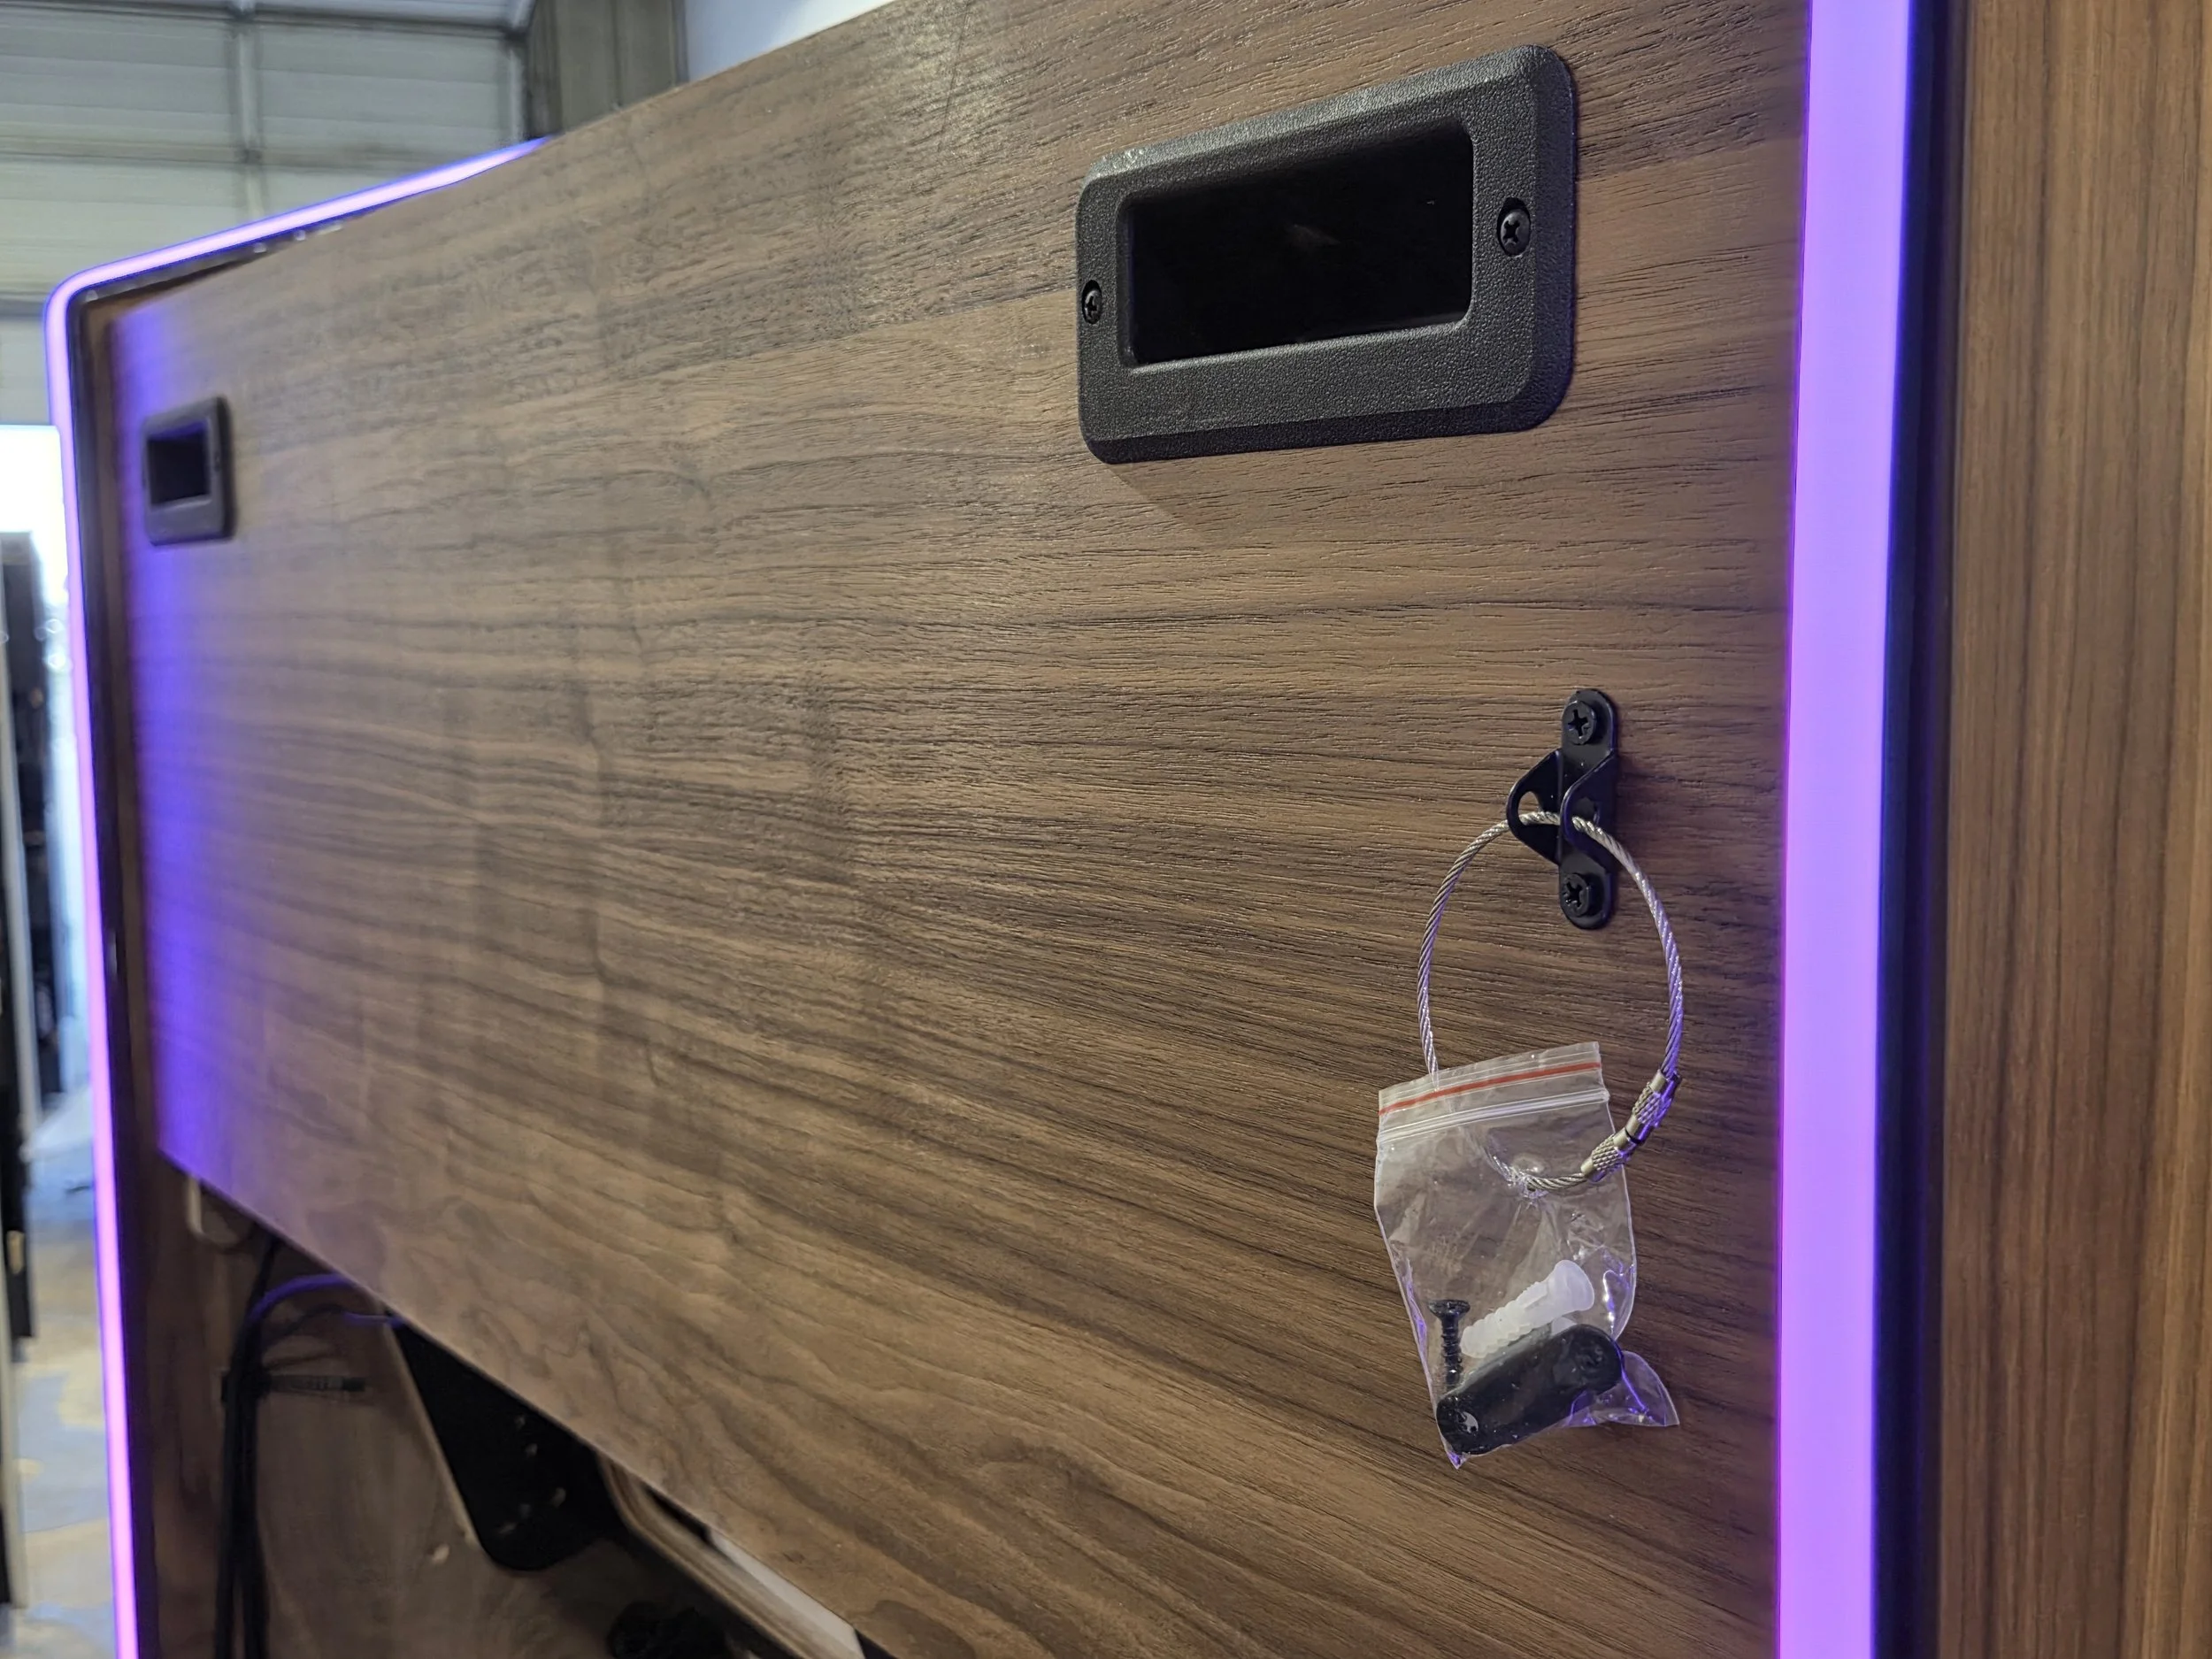
Anti-tip hardware located on the upper rear of the cabinet

Anti-tip instructions
*FALCON 2.0 (Sept 2024 and newer): the white box containing power cord and drawer keycard will be shipped on top of control panel, not inside the cabinet as seen in the video. Falcon 2.0 machines have a drawer lock system, information below.
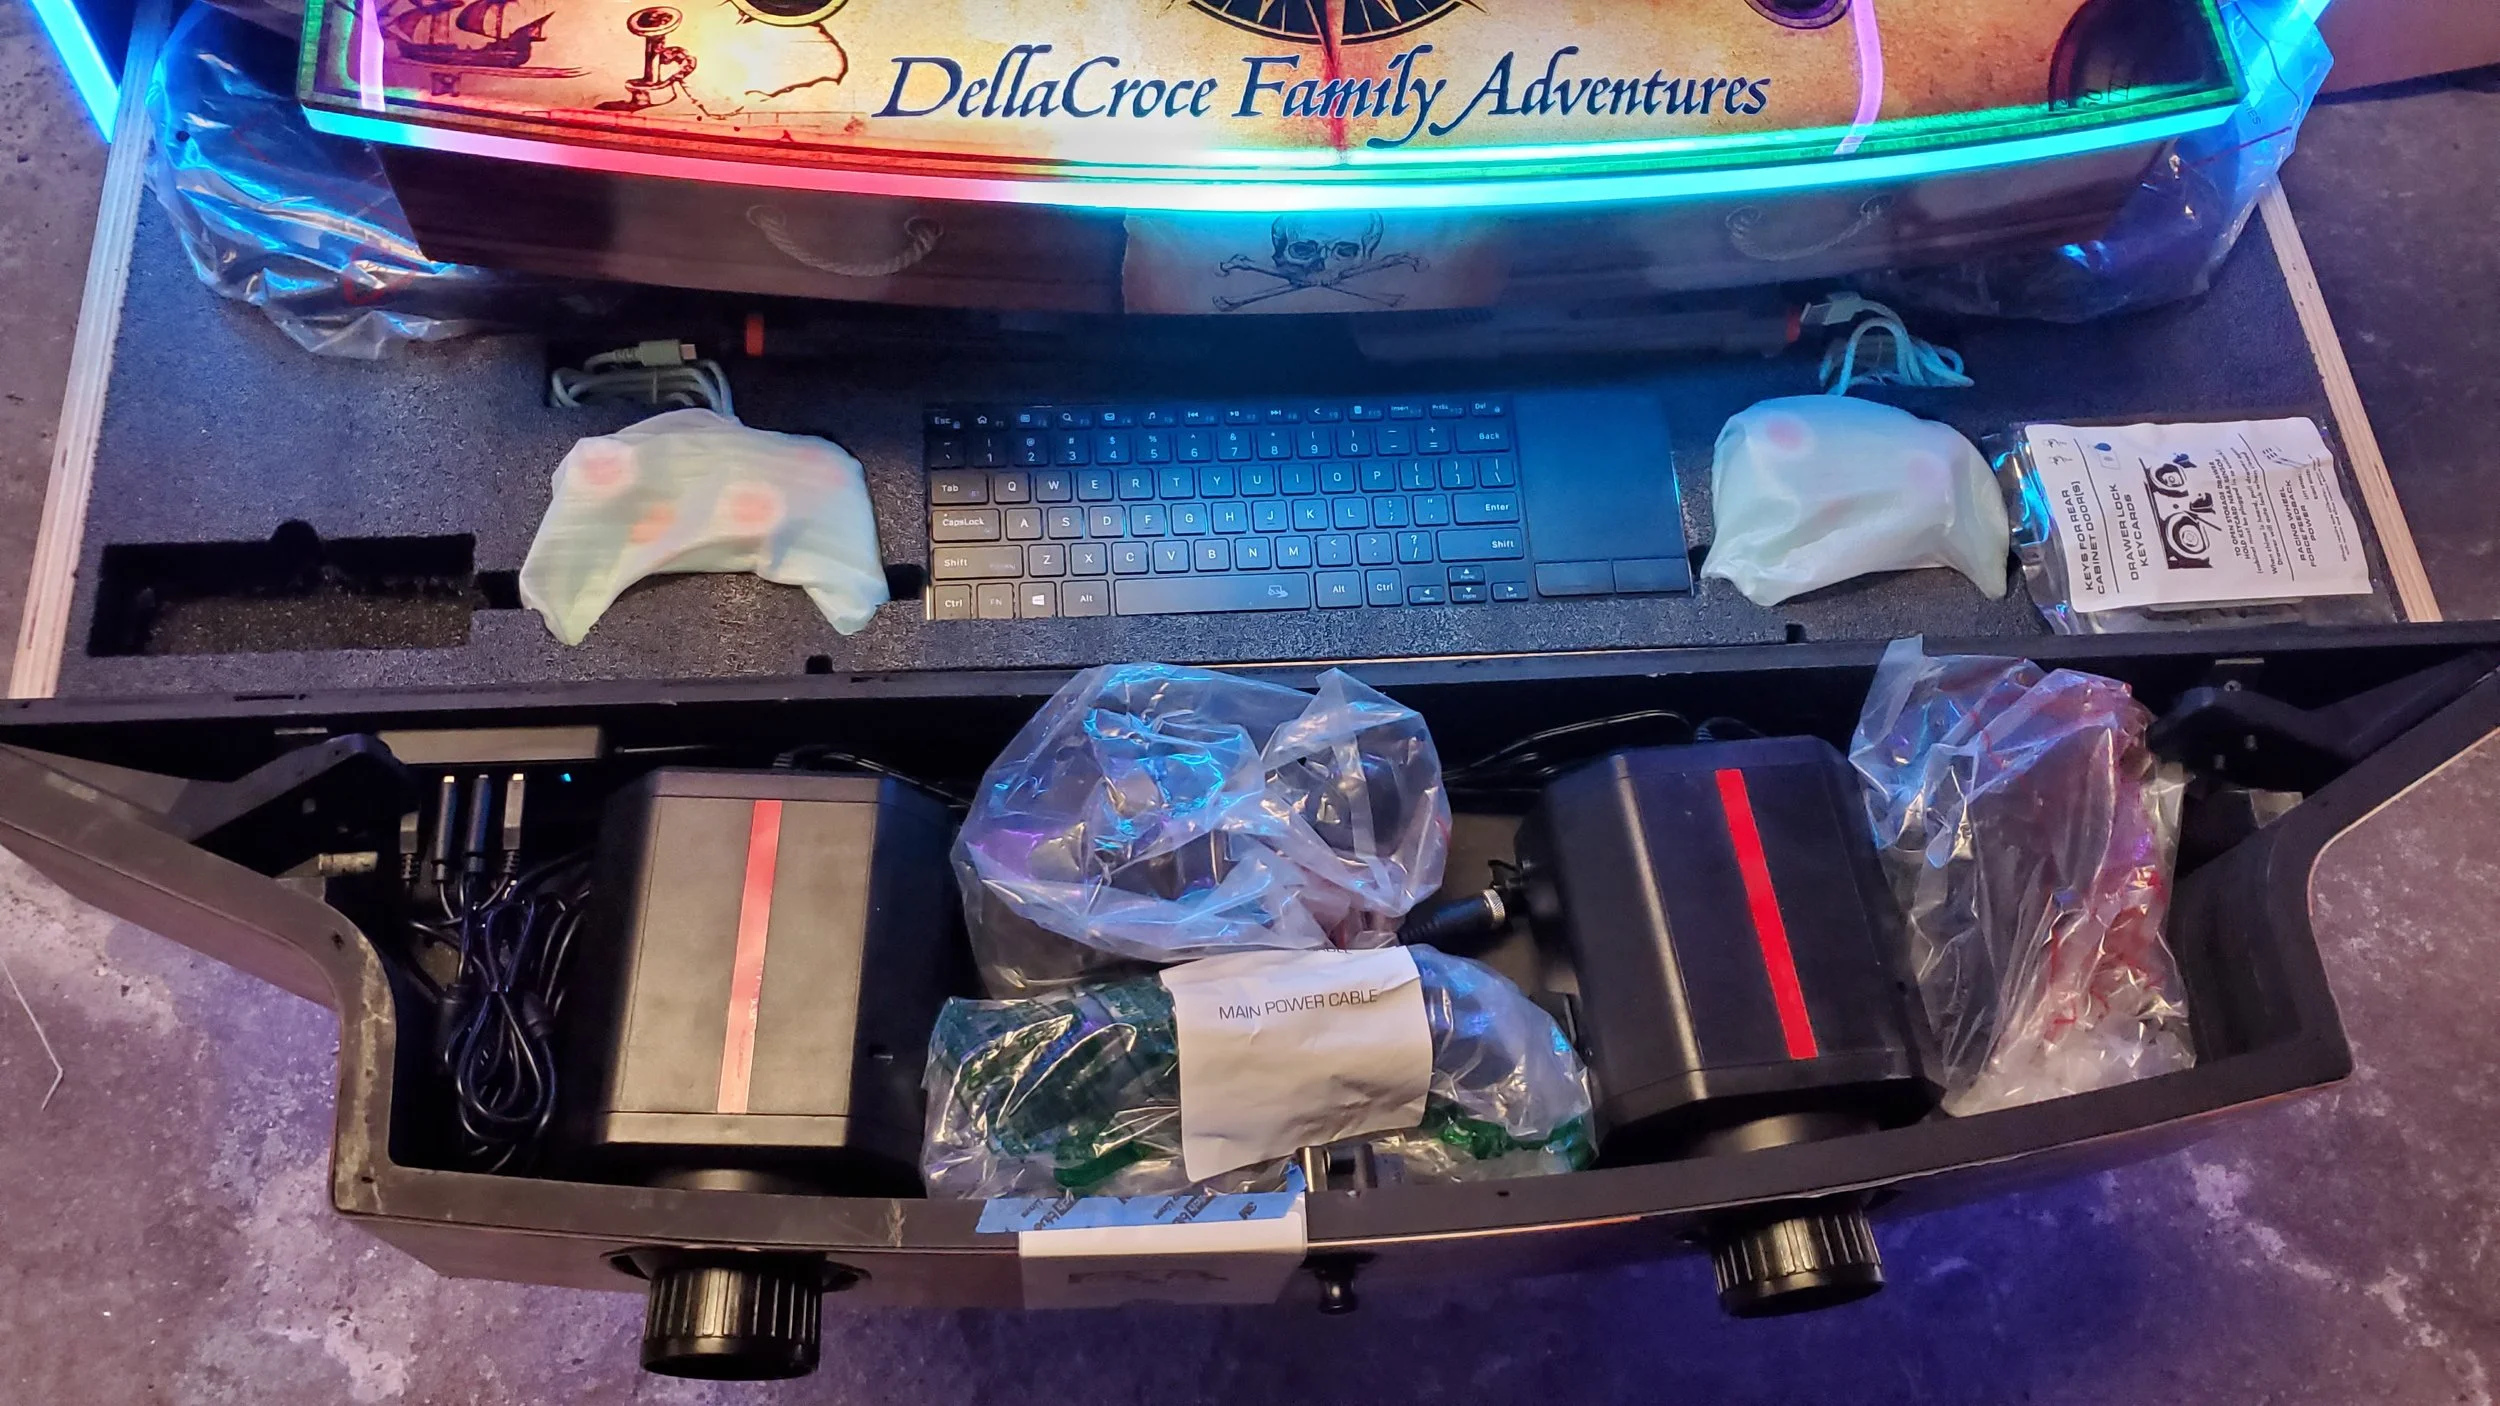
Cables and accessories inside the front portion of the Falcon 2.0 drawer
Bootup
Plug your PDX Arcade into a 120v grounded outlet using the power cord supplied. The switch on the Main Power Inlet turns on the entire cabinet power. There is a computer bootup/shutdown button on the top left rear section of the cabinet to start the system up. If you have the standard 43” monitor you’ll need to use the remote to power up the screen (not required on the Gsync monitors)
IMPORTANT!!
Shutdown
Please use the computer shutdown function with the button on top of the cabinet (instead of the main power switch near the power cord) to turn off the PC. Hard resets can corrupt important input functions!
To properly use the Shutdown Function simply press and release (don’t hold) the SMALL BUTTON on the top left rear of the arcade machine (see pic).

PC Power Switch
DRAWER SYSTEM
Open the FALCON drawer using the instructions below. FTL drawers do not have the electronic lock, simply push the door to spring it open (video example below!).
Inside the storage drawer you’ll find;
Keyboard and keyboard charging cable
Steering Wheels (FALCON only)
Racing Shifters and mounting plates (FALCON only)
Light Guns (which can also be stored in front cutout holsters!) (if purchased)
Wired Gamepads
Wiimotes (if purchased)
LED remotes
FTL Drawer

SOUND

ACCESSORIES
If your machine includes any ACCESSORIES (added peripherals such as Light Guns, Steering Wheels, Guitar Hero, Flight Stick) then please use the ACCESSORIES option in the MAIN MENU to launch your game. This special menu includes the extra coding needed to link sync your hardware into the game. More on navigation can be found in the NAVIGATION section of this site.
Example: You can find AREA 51 in the ‘ARCADE CLASSICS’ section but if you launch it from there the Guns may not sync - simply launch from the Accessories menu and you’re good to go!
LEDS
Control panel LEDs are controlled via small handheld remote, located inside the drawer. Side LEDs on the outer perimeter are controlled via Govee App or you can manually turn them on / off or change color, or set to sound mode using the hardware buttons. See video below for instructions on accessing the hardware buttons.
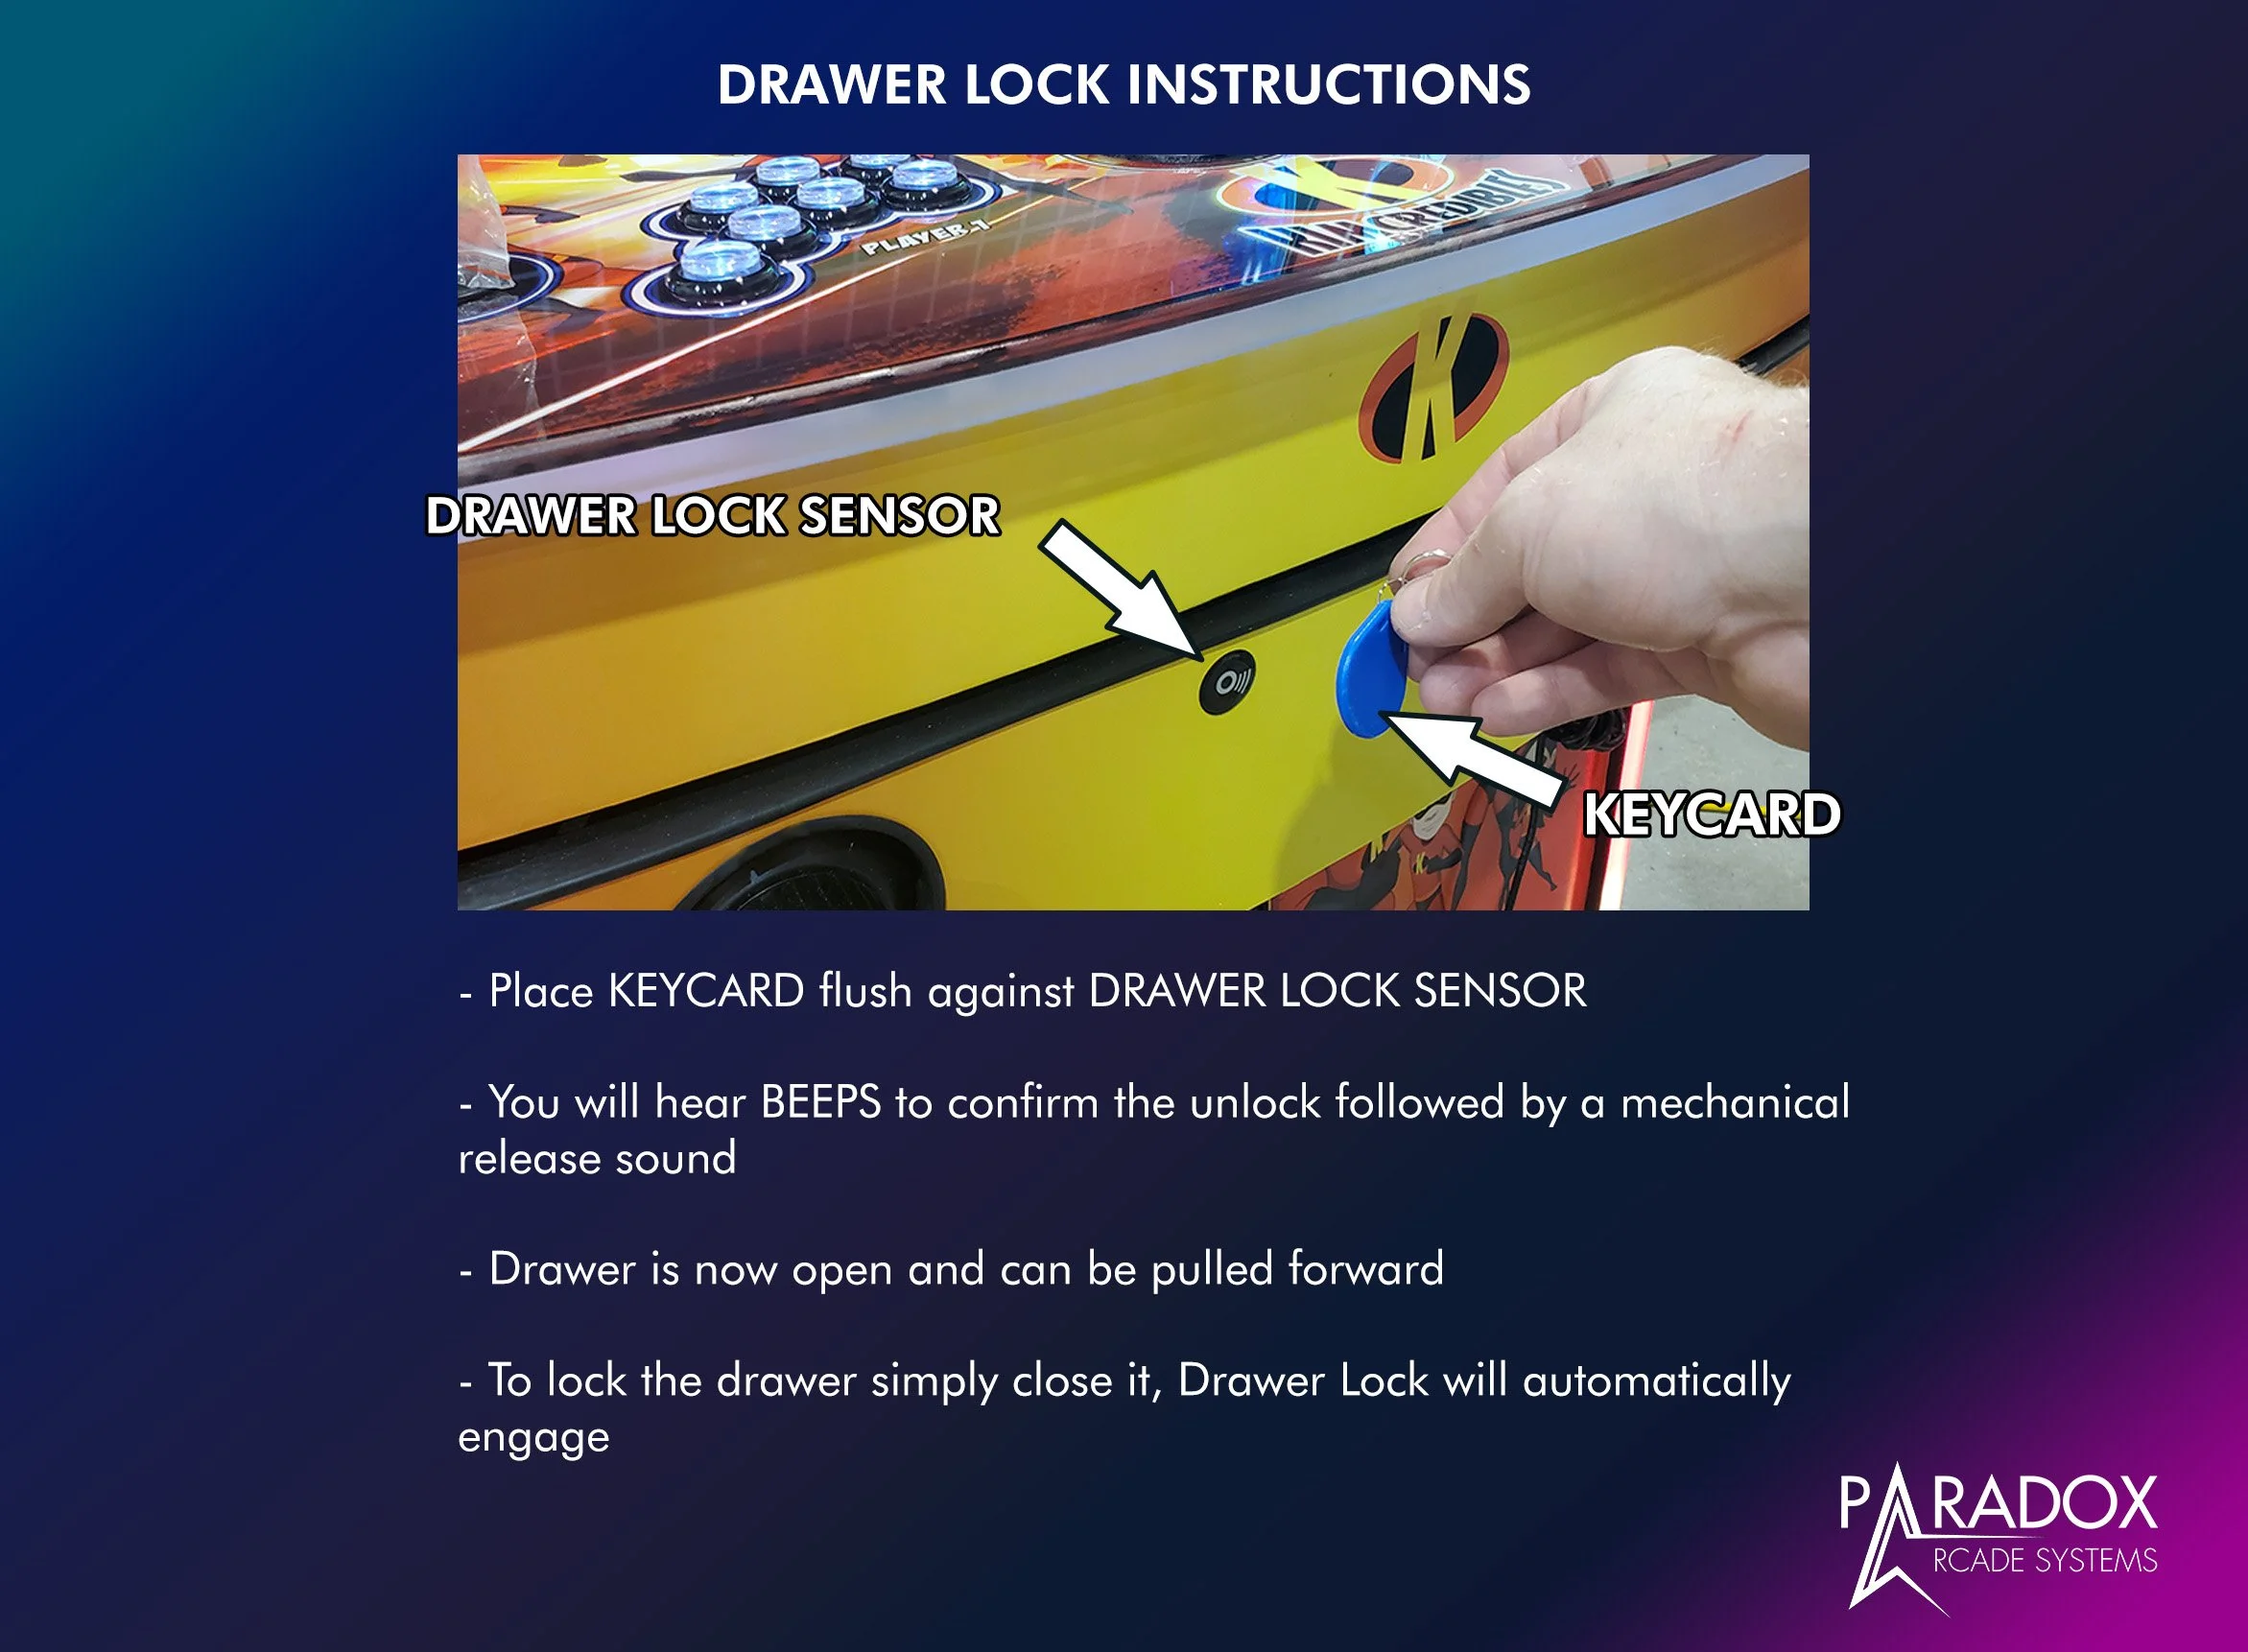
FALCON Drawer (electronic locking system - depricated!)
Special notes on the drawer lock:
Waiting too long to open the drawer after the BEEPS sound will cause the drawer to re-lock
Drawer will not unlock without power. Ensure your cabinet is plugged into the wall and the rear lower switch is turned on